As an Amazon Associate, I earn from qualifying purchases.
Clean & lubricate the machine
New saws come partially disassembled. Follow the procedure outlined in your owner’s manual to assemble the tool. The unpainted cast iron parts may come coated with grease to keep them from rusting during shipment. Before you assemble the machine, clean off the grease with mineral spirits or a silicone spray lubricant. Use a synthetic scrub pad or sponge to clean off the heavy grease. It’s import ant to remove these petroleum-based lubricants before using the saw because they’ll attract sawdust and grime. If there is grease applied to the trunnion and hand wheel gears, clean it off as well. Sawdust and wood pitch will mix with the grease and compact into a stiff paste that makes the gears difficult to mesh.
In place of the grease, wipe a dollop of automotive or furniture paste wax onto the irunnion and worm gears. Wind the wheels through their full range of motion to distribute the wax evenly, and then wipe away the blobs that squeeze out. A thin layer of lubricant is all you need here. You can also use Teflon-based spray or powdered graphite instead of wax.
For used saws, start the cleaning by vacuuming out the SJW base interior or blowing it clean with compressed air. Blow out the motor housing as well if it has ventilation slots on the outside. Use a brass- or plastic-bristled brush (an old toothbrush works great) and mineral spirits to remove caked-on sawdust and pitch from the hand wheel worm gears and trunnion gear teeth. Sometimes it helps to soak these parts with mineral spirits first. Allow the solvent to penetrate the crud, and then brush it away. Once the interior is clean, lubricate the trunnion on and worm gears with wax. Use Teflon spray to lubricate the bushings where the hand wheels mount on the saw base.
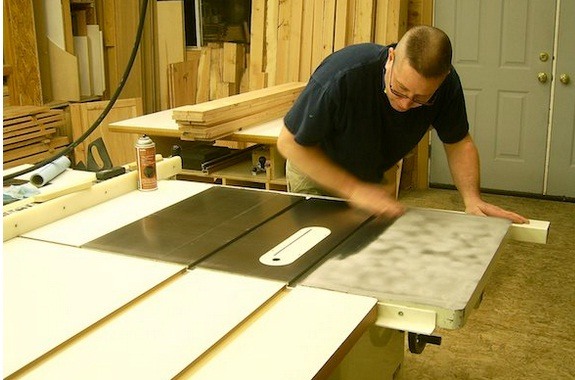
If there is rust on the tabletop or fence rails or in the miter slots, remove it with naval jelly and #0000 steel wool or a synthetic scrub pad. Scour stubborn rust with 600-grit wet/dry sandpaper if necessary. When these surf aces are clean, seal them with a coat of wax (without a silicone additive) to keep them from rusting further. A slippery-smooth tabletop and fence rails make it easier to feed work pieces through the blade and improve the action of the rip fence.
Inspect the drive pulleys for rust, and clean them up, too. Usually the inner sheave surfaces are polished smooth and shiny by the drive belts unless the saw has been stored in a damp place and not used. Cleaning the pulley sheaves promotes even belt wear when you begin to use the machine.
As far as other lubrication is concerned, the arbor bearings are typically scaled and permanently lubricated. Apply grease only if there are fittings near the hearings. Inspect the motor housing for information about oiling, and follow the instructions using the proper machine oil. Most new motors have sealed bearings that are lubricated for the life of the hearings.
With the saw clean, lubricated, and waxed, give the blade a good cleaning. You’ll need a clean, flat blade for adjusting the alignment of the miter slots and arbor. A variety of specialized blade cleaners are sold, but spray-on oven cleaner dissolves wood pitch and sawdust deposits just as well. Citrus-based liquid cleaner also works, and without the caustic fumes. Coat the blade with cleaner in a shallow tray. If you use oven cleaner, seal the blade for a few hours in a plastic bag so the Fumes can contribute to the cleaning process. Then scrub the blade thoroughly with fine steel wood or a scrub pad. Don’t leave oven cleaner on a carbide blade for extended periods of time. The chemicals can weaken the carbide. Be sure to wear solvent-safe gloves and eye protection.
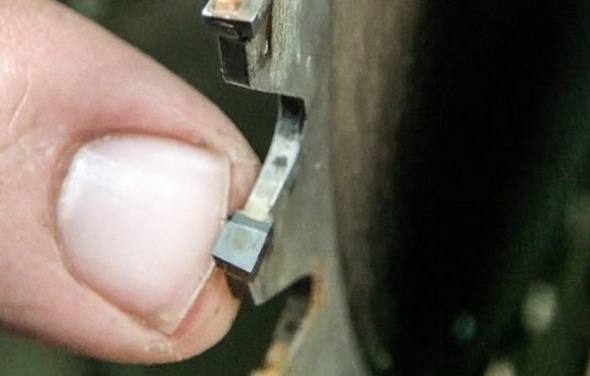
Once the blade is clean and dry, inspect the carbide teeth closely for chipped edges. A magnifying glass makes this process easier. It will also reveal whether there are small cracks in the brazing behind the teeth. If just a few teeth are slightly chipped, the blade is still usable as is. Chipping is a normal part of blade wear, and the carbide will chip sooner lilt isn’t kept clean. However, if the blade is missing even one carbide tooth or you discover cracked brazing, it’s time to send the blade to a sharpening service or replace it.
Inspect the drive train
With the internal areas of the saw clean, and belts and blade installed, start the machine. A table saw with a properly aligned drive train—motor, belts, pulleys, and arbor assembly—should come up to speed smoothly and run with minimal vibration. Vibration is the worst on contractor’s saws because the motor hangs cantilever-style behind the arbor assembly on a hinged plate. If the belt is misaligned between the motor and arbor pulleys, it won’t ride evenly and the motor will bounce tip and down. It doesn’t help that contractor’s saws also have single, long drive belts that are prone to more slipping and lash than the short, well-supported belts on cabinet saws. Direct-drive bench top and cabinet saws are less prone to motor vibration since the motors in these saws are more securely mounted beneath the table. If a bench top saw vibrates, the source is likely a problem inside the motor itself, such as had hearings. Cabinet saws generally aren’t plagued with much vibration, given their heft, but deteriorated belts or poor hearings are still causes for unnecessary vibration. On any caliber saw, vibration can also emanate from the blade if it isn’t spinning in a flat orbit on the arbor.
Vibration migrates out to the rim of the saw blade, causing it to flex hack and forth. This action widens the blade kerfs and makes rougher sawn edges. A saw that shakes can also cause cut-offs near the blade to drift hack into the teeth and he thrown from the tool—usually in your direction. Rattles and jitters make a table saw noisy and unpleasant to use. For all these reasons, vibration is worth remedying during a tune-up.


Leave a Reply