As an Amazon Associate, I earn from qualifying purchases.
How to use a plasma cutter is a new article that will show you basic steps you should take when using a plasma cutter
The plasma cutter is a type of machine that is used to cut solid pieces. It is easy tool to work with, even for the newer. And, in this article, we will show you some of the basic steps on how to use a plasma cutter properly.
How To Use A Plasma Cutter- Step-By-Step Instructions?
Step 1: Safety First
You have to take some safety precautions while using a plasma cutter. Some other safety precautions you need to take are:
- Ensure that the plasma cutter is wired properly and grounded
- Stand on a rubbing mat while using the cutter
- Wear rubbing gloves apart from welding gloves
- Ensure that the working environment is not wet or moisturized
- Ensure that your clothing can protect your skin
- Wear safety glasses or a face shield
Step 2: Caution
Before starting the plasma cutting process, it is important for you to know the potential effects of this process. Know that it will cause high level of fumes, noise, high temperature as well as ultraviolet radiation. In some cases, you also need to deal with molten metal.
Step 3: Choosing The Right Cutter
If this is the first time you have used a plasma cutter, it is better for you to choose the friendlier version that does not need you to manually change the pressure.
Step 4: Measuring The Thickness Of The Metal
Before you use the plasma cutter, you need to know the metal’s thickness. And then, you can choose your plasma cutter depending on this figure.
Step 5: Connecting To Input Power
Now, it is time to connect the input power with the plasma cutter. Basically, plasma cutters can work with many different input powers. Therefore, it is important to ensure that you insert the power cord of the cutter to the right plug.
Step 6: Placing The Metal On A Flat Surface
You place the metal that you want to cut on a flat surface, ideally on a wooden table. Also, it is important that there is not any flammable substance around this working area.
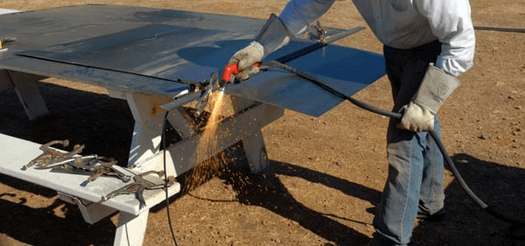
Step 7: Using The Torch
Now, you start using the torch to cut the metal. Try to hold the torch of the cutter close to your metal surface. And then, you pull the trigger before moving the torch to cut the arc. Yu need to ensure that you are penetrating through the bottom of the metal. After that, you hold the torch perpendicularly and then move it around your metal
Step 8: Judging And Fixing The Speed
After the torch moves, you can consider whether you are cutting it right or not. In case you do not see any spark below your metal, which means that the speed you are using is not accurate and the metal has not been penetrated. To fix this issue, you can make some minor adjustments. Check that you minimize the speed of the equipment and you get enough output amperage.
Step 9: The Finishing Cut
Getting the finishing cut right is quite important. When reaching the finishing point, your torch should be placed at an angle. A tip for you is to pause when you are reaching the last bit, and then keep on with the cutting.
Step 10: Cooling The Cutter
After you completely cut the metal, the plasma cutter should be put away. Try to hold it on for several seconds so that it cools off a bit. Generally, plasma cutters have a cool-off system, so they can automatically cool down within a few seconds.
Generally, working on with a plasma cutter is so simple. Whether you would like to bevel or cut a metal sheet, the using is quite convenient. However, the selection of the right plasma cutter is challenging. Just need to choose the right one that suits your metal and accomplishing the task will not be difficult.

Leave a Reply